Categories

Showing posts with label monsters university. Show all posts

Wednesday, March 17, 2021

MINDY KALING JOINS THE CAST OF DISNEY+ ORIGINAL SERIES ‘MONSTERS AT WORK’ FROM DISNEY TELEVISION ANIMATION


BURBANK, Calif. (March 17,  2021) -- Mindy Kaling has joined the cast of Disney+'s highly anticipated animated series "Monsters At Work." Kaling will voice the role of Val Little, an enthusiastic member of the Monsters, Inc. Facilities Team (aka "MIFT"). Additionally, Bonnie Hunt will reprise her role as Ms. Flint, who was formerly in charge of training new Scarers at Monsters, Inc., but will now manage the department responsible for recruiting and training the funniest monsters to become Jokesters. "Monsters At Work" will begin streaming Friday, July 2, exclusively on Disney+.


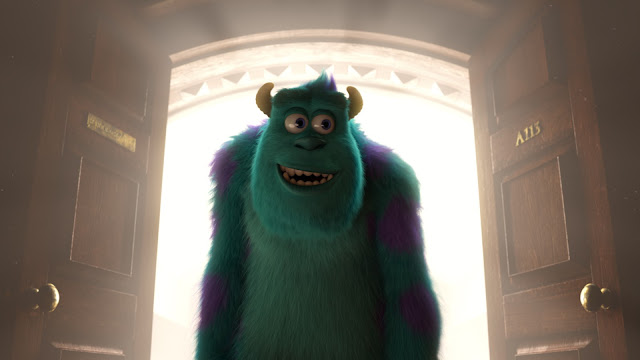
Ben Feldman stars as the voice of Tylor Tuskmon in the series, which introduces new monster characters alongside returning favorites, including Mike Wazowski and James P. "Sulley" Sullivan, who will again be voiced by renowned actors Billy Crystal and John Goodman. Starring alongside Feldman and Kaling as part of the MIFT crew is Henry Winkler ("Happy Days") as Fritz, the scatterbrained boss; Lucas Neff ("Raising Hope") as Duncan, an opportunistic plumber; and Alanna Ubach ("Coco") as Cutter, the officious rule follower. 


"Monsters At Work" takes place the day after the Monsters, Incorporated power plant started harvesting the laughter of children to fuel the city of Monstropolis, thanks to Mike and Sulley's discovery that laughter generates ten times more energy than screams. It follows the story of Tylor Tuskmon, an eager young monster who graduated top of his class at Monsters University and always dreamed of becoming a Scarer until he lands a job at Monsters, Incorporated, and discovers that scaring is out and laughter is in. After Tylor is temporarily reassigned to the Monsters, Inc. Facilities Team (MIFT), he must work alongside a misfit bunch of mechanics while setting his sights on becoming a Jokester.

In addition to Crystal, Goodman and Hunt, returning cast members from the original movies include John Ratzenberger as Yeti and Tylor's dad, Bernard, Jennifer Tilly as Celia Mae and Bob Peterson as Roze, twin sister to his original "Monsters, Inc." character, Roz. Voicing additional characters are Stephen Stanton ("Star Wars Resistance") as Smitty and Needleman, the bumbling custodial team at Monsters, Inc., and Aisha Tyler ("Archer") as Tylor's mom, Millie Tuskmon.


Produced by Disney Television Animation, the series was developed and is executive produced by Disney animation veteran Bobs Gannaway ("Mickey Mouse Clubhouse," "Planes: Fire & Rescue"). Academy Award-nominated Sean Lurie ("Inner Workings") is producer, and Kat Good ("Big Hero 6 The Series") and Steve Anderson ("Meet the Robinsons") serve as supervising directors. The late Rob Gibbs ("Monsters, Inc.") also served as director on some of the earlier episodes.


Kaling is represented by CAA, 3Arts, The Lede Company and Ziffren Law. Hunt is represented by WME and Edelstein, Laird & Sobel Law.

Friday, October 25, 2013

US Women's National Soccer Team visits Pixar

The US Women's National Soccer Team visited Pixar in Emeryville, CA today, where they spent time with the Pixar Soccer team, and took "Monster Drawing 101" with character designer Chris Sasaki who designed  Art from Monsters University (on Blu-ray Tuesday), and enjoyed a tour of the grounds.  

The USWNT will face New Zealand in a friendly on Sunday at Candlestick Park in San Francisco.


Blu-Ray Review: Monsters University!


It's time for another Blu-Ray Review! This time it is for the Monster's University 3D Blu-Ray Ultimate Collector's Edition!

Click the link below to read my review of the movie!
Review of Monsters University!

Video Quality
The 3D as well as the 2D presentations are some of the best ones I have seen all year! The colors are lush and vibrant! You will love the details as you will see every bit of fur, slime and scales with straight from the digital source perfection! The 3D produces a convincing amount of depth! This is one of Disney's best efforts this year! 

Audio Quality
The audio is even better than the video here! The front speakers bring everything to life espeically Sulley's roars! The rear channels are surprisingly active creating a very immersive environment. Voices are crystal clear and there are some great uses of the surround sound field. Wait until you hear the audio created in the library scene as well as the rest of the Scare Games!

Bonus Features

  • Blue Umbrella (Disc 1 & 2, HD, 7 minutes): Pixar's latest gorgeously animated short film, is thankfully presented in 3D on Disc 1 and 2D on Disc 2.
  • Audio Commentary (Disc 2): Director/co-writer Dan Scanlon, producer Kori Rae and story supervisor Kelsey Mann provide wonderful insight on Pixar's first prequel. You will learn about the the decision of ignoring Mike's line from the original film about meeting in the fourth grade, animation, story development, voice casting, and more.
  • Campus Life (Disc 3, HD, 15 minutes): Take a look at a day in the lfie of the movie and it's production from meetings, to animation reviews, to voice recording sessions and more.
  • Story School (Disc 3, HD, 9 minutes): Take a look at the process of crafting the story from conceptual artwork, to pre-visualization, to storyboarding.

  • Scare Games (Disc 3, HD, 5 minutes): "Pixar takes its fun very seriously!" See how the MU Team brought together a fun competition between the various departments in their own version of the Scare Games.
  • Monthropology (Disc 3, HD, 6 minutes): How the MU team created a diverse amount of monsters to make up the student body using every tool in their arsenal!
  • Welcome to MU (Disc 3, HD, 6 minutes): Learn about the campus itself, including its architecture, grounds and history.
  • Music Appreciation (Disc 3, HD, 7 minutes): Creating the score for Monsters University with Scanlon, music editor Bruno Coon and composer Randy Newman.
  • Scare Tactics (Disc 3, HD, 5 minutes): Learn how the animators performed and created the look for the perfect scare.
  • Color and Light (Disc 3, HD, 5 minutes): Look at before and after shots of the MU as color and light is incorporated.
  • Paths to Pixar: MU Edition (Disc 3, HD, 8 minutes):Take a look at how some of the folks at Pixar came to work at Pixar!
  • Furry Monsters: A Technical Retrospective (Disc 3, HD, 5 minutes): Take a look at the differences in animation between the original Monsters, Inc. and Monsters University!
  • Deleted Scenes (Disc 3, HD, 22 minutes): Four unfinished deleted scenes -- "Rivalry" (an alternate version of Mike and Sulley's meeting), "Recon," "Movie Night" and "Drama Class" -- with director's intros.
  • Promo Picks (Disc 3, HD, 14 minutes): Take a look at all the commercials, promos, teasers, trailers and tie-ins for Monsters University.
  • Set Flythroughs (Disc 3, HD, 6 minutes): Check out the Monsters University campus, the Scare School, Frat Row and the OK House beautiful high definition fly-throughs.
  • Art Galleries (Disc 3, HD): View a large collection of artwork divided into five categories: "Characters," "Color Keys," "Development Art," "Environments" and "Graphics."
This is an 'A++++' effort by Disney/Pixar. Perfect video, audio, 3D, and a ton of bonus material!
Time to pack up your bags and get ready for another semester at MU! Monsters University hits store shelves October 29th!

Monday, October 21, 2013

Saturday, October 19, 2013

SULLEY goes to DARTMOUTH COLLEGE!

Sulley paid a visit to Dartmouth College in New Hampshire where the Dartmouth Film Award and Tribute to Pixar was presented to producer Kori Rae and director Dan Scanlon.
MONSTERS UNIVERSITY producer Kori Rae and fellow student Sulley started the day Saturday with a photo op with film students in front of the Spaulding Auditorium and then off to the Dartmouth vs. Yale Homecoming Football game. Halftime score had Dartmouth crushing Yale. The Dartmouth Band played a selection of music from MU as Kori and Sulley paraded across the field to salute fans at the 50 yard line. The student body and spectators went wild. Lots of pictures were taken and Sulley lingered to shake hands with a lot of the Big Green. Final score was Dartmouth 20, Yale 13.

Sunday evening was the highlight with the Dartmouth Film Award and Tribute to Pixar presented by The Hopkins Center for the Arts at Dartmouth College.  The night began with a moving Pixar tribute reel followed by Sulley escorting Director Dan Scanlon and Kori to the stage for a moderated Q&A and showcase of bonus features "Monthropology," "Scare Games," and "Paths to Pixar."  

Friday, October 18, 2013

Bonus Clips from Monsters University!

In anticipation of the October 29th release of MONSTERS UNIVERSITY on Blu-ray Combo Pack check out some bonus clips below!

Bonus Clip: Drama Class
Description: Deleted scene of Mike and Sully performing together during drama class

Bonus Clip: Hardscrabble
Description: Exploring the difficulty and inspiration behind designing Dean Hardscrabble from Monthropology.

Bonus Clip: Sully and Mike's Theme
Description: Director Dan Scanlon and composer Randy Newman discuss Mike and Sully's music theme throughout the film

Sunday, October 6, 2013

Giveaway: Mike and Sulley Treat Bag!


Win this two sides treat bag featuring Mike and Sulley!
Please note this is a treat bag and not a bag filled with treats!
a Rafflecopter giveaway

Friday, June 28, 2013

Monsters University: Hidden Gems - Luxo Ball!

Luxo – The Pixar Luxo ball is in graffiti on the wall behind Claire Wheeler and Brock Pearson during their introduction to the Scare Games’ first challenge. Pixar Animation Studio’s groundbreaking short film “Luxo Jr.” was the first computer animated short film released by Pixar during its first year as a studio in 1986.


Like MONSTERS UNIVERSITY on Facebook: http://facebook.com/PixarMonstersUniversity 
Follow Monsters University on Twitter: http://twitter.com/monstersu 
Tweet the official hashtag: #MonstersU
Visit the website: http://www.Disney.com/MonstersU

MONSTERS UNIVERSITY is in theaters now!

Monsters University: Hidden Gems - Pizza Planet Truck!

Pizza Planet – The Pizza Planet truck is in the driveway of the JOX fraternity house when Mike is riding Archie the Scare Pig down Greek Row. The Pizza Planet truck, which first made an appearance in "Toy Story," has made a cameo in nearly every Pixar feature film.


Like MONSTERS UNIVERSITY on Facebook: http://facebook.com/PixarMonstersUniversity 
Follow Monsters University on Twitter: http://twitter.com/monstersu 
Tweet the official hashtag: #MonstersU
Visit the website: http://www.Disney.com/MonstersU

MONSTERS UNIVERSITY is in theaters now!

Monsters University: Hidden Gems - A113!

A113 – The School of Scaring classroom number is A113, which refers to the former classroom of John Lasseter, Brad Bird, Pete Docter and Andrew Stanton at CalArts. The number makes an appearance in every Pixar feature film.


Like MONSTERS UNIVERSITY on Facebook: http://facebook.com/PixarMonstersUniversity 
Follow Monsters University on Twitter: http://twitter.com/monstersu 
Tweet the official hashtag: #MonstersU
Visit the website: http://www.Disney.com/MonstersU

MONSTERS UNIVERSITY is in theaters now!

Friday, June 21, 2013

Mike Wazowski Cake Pops Recipe!

What you'll need

  • Baked cake (your favorite box mix)
  • 1 Can of frosting
  • Jumbo candy eyes
  • Small white pearl candies (for the teeth)
  • White candy hearts (for the horns)
  • Green candy coating
  • 10 pieces of chocolate candy coating (for the mouth)
  • New and clean craft brush ¼ inch
  • Lollipop sticks
  • Brick of Styrofoam
  • Parchment lined baking sheet
  • Edible food pens
Helpful Tip: If you find your candying coating a little too thick, you can add a few drops of vegetable oil at a time until you get your desired consistency.

How to make it

  1. Bake your cake according to the box instructions and set aside to cool completely. Prep your candy decorations by putting them into a small bowl or plate.
  2. Crumble the cake finely into a bowl. Discard any hard edging of the cake that does not crumble neatly. Spoon in ½ - ¾ the can of frosting and use your hands to mix the frosting thoroughly into the cake.
  3. Using your hands, scoop out a small portion of cake and roll it into a ball.  Shape the ball into a fat teardrop shape and place on a parchment lined baking sheet. Once all the cake is shaped, place the cookie sheet into the freezer for 15 minutes. After that time, transfer to the refrigerator.
  4. Meanwhile, pour the green candy coating into a microwave safe bowl and microwave at 50% for 40-second intervals. Stir after each 40-second interval, being careful to not over heat the candy coating. When there are only a few lumps left, stir the coating until it is melted and smooth.
  5. Remove 3 or 4 cakes from the refrigerator at a time to dip. Dip the end of a lollipop stick into the coating, then insert into the bottom of the cake. Now, dip the pop into the coating, submerging the cake completely. Do not swirl the cake pop or the cake will come apart into the bowl. Let any extra coating drip back into the bowl.
  6. Before the coating dries, insert two white candy hearts on top of the head for the horns pushing the top of the hearts into the coating and letting the bottom of the hearts stick out the top. Insert one jumbo eye into the center of the cake pop closer to the top than the bottom. Insert the stick end of the cake pop into a brick of Styrofoam to let dry. 
  7. Once all the cake pops are dipped and decorated, melt the 6 pieces of chocolate candy coating. Using a new and clean craft brush, dip the brush into the chocolate candy coating and paint on the mouth. Before the mouth dries, place 5 to 4 white pearl candies into the mouth for the top teeth, and 3 to 4 pearl candies for the bottom teeth. Repeat with the rest of the cake pops.
  8. Once all the mouths are dry, use a black edible food pen and draw a line across the middle 3 upper teeth for Mike’s retainer.

Craft Time: Art Monsters University Marionette Craft

Download Art Monsters University Marionette Craft 

What you'll need

  • scissors
  • hot melt glue gun or craft glue
  • 1 violet or medium purple marabou boa (the small fluffy type around 2"in diameter) cut to 15"in in length.
  • 1 dark purple or dark blue marabou boa (optional*)
  • 2 two wooden dowels (3/8"in to 1/2"in in diameter and approximately 12"in in length)
  • 2 pennies
  • 2 googly eyes ( approximately 1/2"in)
  • Fishing line cut to the following lengths: 1 piece at 14"in, 2 pieces at 16"in and 2 pieces at 20"in
  • Pipe cleaners: 2 dark red, 2 dark blue, 2 purple (sparkly purple if available)
  • 2" x 4"in piece of black stiffened felt
  • 2" x 4"in piece of white felt
  • 2" x 1"in piece of purple craft foam
Variations: You can substitute other marabou boa colors and make your own monsters as well.

How to make it

  1. step 1These initial 2 steps are optional, but should be done first if you desire a stripe-legged monster marionette that closely resembles the character Art from Monsters University.  If you don't want to add stripes to his legs, skip to step 3. Refer to Fig. 3 in the PDF template as reference to help you determine where you will place your stripes.  Take your 15"in violet or medium purple boa (this will be Art's body) and measure up 1"in from the end and proceed to  trim an inch of feathers above your measured line taking the feathers down to the string while taking care not to sever the cord.  Measure up 1"in more above the gap you just created and create another gap by duplicating your trim job again.
  2. step 2Lay a 4"in piece of the darker boa underneath and perpendicular to the exposed cord.  Add glue to the exposed cord and wrap the darker boa tightly around the gap one time.  You may need to add more glue, but be careful not to burn your finger or singe the feathers in the process.  Repeat step 1 and 2 on the other side of the violet boa and for stripes should be completed. You may find you need to trim the grafted-on boa to match the length of the original, but don't be too neat about it.  It is a monster after all!
  3. step 3Hot melt glue a penny to each end of the 15" violet boa.
  4. Stringing the puppet - (Refer to Fig. 1 in the PDF template) Tie the 14"in fishing line to the center of the violet boa and tie the other end to the center of of Dowel 1.  Tie each 16"in string half-way between the center line and the end as pictured. Tie the 20"in string around the penny on the bottom of each leg and attach the other end to the ends of Dowel 2 as pictured.
  5. step 5Creating the arms - (Refer to Fig. 1 in the PDF template) Bend the dark blue pipe cleaner to resemble the arms and hands pictured.  Wrap the purple pipe cleaner around the wrist and work your way up to the top of the arm and make a loop.  Tie fishing line through the loop and tie the other end to the body (refer to Fig 3 for placement) and leave enough slack in the fishing line so the arms dangle a little.  Repeat for the opposite arm.
  6. step 6Trace the mouth shape onto black stiffened felt and cut out.  Trace the teeth shape on white felt and place on the black felt mouth.
  7. step 7Take two dark red pipe cleaners and twist them around each other to add thickness.  Use the Lips template and copy the exact size and shape cutting off the excess pipe cleaner after twisting the end closed.  Glue this on top of the teeth and mouth.
  8. Trace the eyelid template onto the purple craft foam and cut it out.  Glue your two googly eyes underneath the eyelids so they appear half closed.
  9. step 9Glue the bottoms of the googly eyes on the top edge of the block mouth just behind the lips.  Now glue the face on the center of the body.
  10. step 10You're all done!  Tilt Dowel 1 from side to side to make Art walk.  Lift Dowel 2 up high to have Art stand on his hands. 

    Source: http://spoonful.com/crafts/monsters-university-marionette-craft

Craft Time: Monsters University Board Game

Download Monsters University Board Game Template 

How to make it

  1. Print the game board and game pieces on regular paper or cardstock and cut them out.
  2. Assemble the board by cutting off the white margins, and then apply tape to the back to secure the four sections.
  3. For the game pieces, fold the paper at the dashed lines away from you, and then glue or tape the smaller rectangles to the back of the large, middle rectangle. Fold the character toward you and stand him or her up.
  4. Print out the Game Card so you can refer to it as you play.
  5. Game Play:
    For 2 to 6 players
    Roll a six-sided die to determine who goes first. The player who rolls the largest number starts the game. Players should take turns rolling the die to advance their pieces. The first player to reach the finish line wins the game.
    - If you land on a space that has text, read the text and follow what it says.
    - If you land on any of the circular marked character spaces, follow the key on the Game Card.
    - If you land on a character space that matches the game piece you are using, move ahead five spaces. You can only do this once.

    Source: http://spoonful.com/printables/monsters-university-game

Craft Time: Soft Sulley Felt Craft

Download Soft Sulley Felt Craft Template 

What you'll need

  • Template
  • Hot melt glue (hot melt glue should be used by adults only)
  • Scissors
  • Ball point pen
  • Black felt pen
  • Needle and blue thread (optional)

How to make it

  1. Print and cut out the pieces of the Soft Sulley Felt Craft Template. (Note: If stuffing the body is too difficult, you can just glue the front and back pieces together.)
  2. Repeat step 3 with the head pieces.
     
  3. Glue the parts of Sulley’s face in place, including the eye whites, eye irises, eye brows, nose, mouth, tongue, teeth, and horns.
  4. Glue a claw onto each of Sulley’s toes (3 claws on each foot).
     
  5. Glue spots all over Sulley’s body, 2 on each leg, 3 on the front body (avoiding the chest and belly), 2-1 on each arm, the rest can be spread out along his back, the back of his arms, and the back of his legs.
  6. Repeat step 3 with the tail pieces.
  7. Glue 5 tail spines on to the top of the tail. Glue spots to the tail, 2 on each side.
     
  8. Glue Sulley’s tail to the bottom of his back. Glue 3 back spines up his spine, starting at the top of the tail.
     
  9. Trace the pieces onto the appropriate color felt using the materials listed above as your guide.
     
  10. Start by stuffing the body. To do this, you will work from the top down, making pockets by gluing the body front and back pieces together in sections and filling with cotton as you go. Using a hot glue gun, run glue along the edge of one hand, stopping at the arm. Place the second body piece directly on top of the first and press so the glue sticks. Next, pull off a small piece of cotton ball and stuff it inside the hand. Now put glue along the edge of the arm, and then stuff with more cotton. Continue this pattern with the other arm, the chest, the torso, and the legs, stopping to stuff each piece with cotton before moving on to the next. To finish, seal the feet shut with glue. You also have the option to sew the two body pieces together as shown in the photo, instead of using glue.
     
  11. Glue the completed head onto the body.
  12. Glue spots all over Sulley’s body: 2 on each leg, 3 on the front body (avoiding the chest and belly), and 2 on each arm. The rest can be spread out along his back, the backs of his arms, and the backs of his legs.
  13. Use the black felt marker to draw a black pupil on each eye. Draw 2 nostrils on the bottom of the nose.

    Source: http://spoonful.com/crafts/soft-sulley-felt-craft

Craft Time: Monsters University Stickers

Download Monsters University Stickers Template 

How to make it

  1. Print the page on sticker paper. Cut out each sticker and enjoy!

    Source: http://spoonful.com/printables/monsters-university-stickers

Media Screening Review: Monsters University and The Blue Umbrella!

Hi all! I just came back from a media screening of Monsters University at The El Capitan Theatre in Hollywood! As a huge Monsters, Inc. fan I had high expectations for this prequel and I was not disappointed!

But before I get into my review for Monsters University, let's review the short in front of the movie, The Blue Umbrella!

The story here is very much along the lines of last year's Paperman from the Walt Disney Animation Studios. But with each Pixar short is a testing ground for improving the look and feel of their movies.
The goal with The Blue Umbrella was to increase the level of photo realism and this hit it out of the park. Take a look at the image above. You would be hard pressed to know this was fully animated if someone didn't tell you.
The short is so charming and full of heart like all the Pixar shorts and was a great way to get ready for Monsters University!

So, now  we get to one of my most eagerly anticipated films of the year, Monsters University!

Pixar has created their first prequel and they get the prequel right. I believe that the purpose of any prequel is to get one to forget about the original movie and most prequels are just not up to the task.

Not only does Monsters University add another layer to the Mike and Sulley story, but I think in many ways it is a better film than Monsters, Inc. is. Clearly the scale of Monsters, Inc. is huge compared to Monsters University but Monsters University brings into a world of a very real and surprising friendship. We already know that in the end Mike and Sulley will be friends for life but here we are presented with a touching story of how these two went from rivals, to very reluctant allies, to true friendship.
We start the film with little Mike Wazowski with his classmates on a field trip to Monsters, Inc. where Mike realizes that he can become a scarer! He commits his life to doing everything he can to attend Monsters University and become a top scarer!
We then jump to Mike's first day at, yep you guessed it, Monsters University! Mike is so passionate about becoming a scarer but just isn't scary. Sulley on the other hand has cruised through high school but in college he finds that he can't cut in the smarts department.

Eventually both Mike and Sulley have to join the rejects from the worst fraternity Oozma Kappa to win the Scare Games. The Scare Games were created by Dean Hardscrabble herself to test the best scare students. The Oozma Kappas are made up of the older Don, the space cadet Art, the twins Terri and Terry, and the young but eager Squishy. These frat brothers do not conjure up any ideas of confidence.
This is where Mike and Sulley really begin to work through their differences. This is where the film really begins to shine. Pixar's story team remembered that the audience that saw Monsters, Inc. has grown up and many of them have probably experienced these same life changes. The message here is clear, change is not to be feared but to be embraced. The best stories from Pixar come from real emotions and a chance to stop and reflect. Monsters University has a lot to say on how people change as they get older and how their relationships change without being preachy about it. The story flows from one segment to the next. In the end, you know Mike and Sulley are going to be best friends but the journey to get there is more heartfelt than one would ever expect.

Monsters University is a more than worthy follow-up to Monsters, Inc. If you are a fan of the first movie, you will love the second. You may even love the second more than the first like I do! This is a very welcomed addition to the Pixar library and now it's time to put on my favorite Monsters University cardigan and cheer for good old MU!

Thursday, June 20, 2013

Craft Time: Art 3D Papercraft

 Download Art 3D Papercraft Template

How to make it

  1. Print the template on regular paper or cardstock and cut out the pieces.
  2. Starting with the Right Leg, make folds along all dashed lines away from you. Using glue or double-sided tape, secure the A tab to the back of the panel next to it. Continue this pattern with the remaining tabs in alphabetical order. Complete the shape with the O tab. Repeat for the Left Leg.
  3. Using glue or double-sided tape, attach the left side of Art’s face to the left leg and the right side of his face to the right leg. Flip him over and do the same for the back of his head.
  4. Fold each arm in half along the center dashed line and secure so the design is two-sided. Using glue or double-sided tape, secure each arm to the front of Art’s head, near the bottom edge.

    Source: http://spoonful.com/printables/art-3d-papercraft